Archived, read-only copy of the Vivarium Forum (2006 to 2014). Posts belong to their original authors.

Limited Guest Access ... Welcome to the Vivarium Forums. You are currently viewing our boards as a GUEST, which gives You very limited access and no posting privileges. Register and gain full access to everything on the site. Vivarium Forum membership is completely free with no tricks or gimmicks. If you have any problems with the registration process or your account login, please contact support.

Go Back   Vivarium Forums > PALUDARIUM > Paludarium > Palu-General


Reply
LinkBack Thread Tools Display Modes
  #1  
Unread 05-30-2012, 12:25 AM
megamax42's Avatar
Chasing Crickets
 
Join Date: May 2012
Posts: 31
megamax42 is on a distinguished road
Default 38 Gal Paludarium Build

Hello! New to this forum but a member of quite a few others. Figured I'd share my paludarium build here, will post pictures as soon as the forum lets me.

The plan right now is a fire belly toad tank, planted in land, water and immersed conditions. Fish also inhabiting the water portion.

A dilemma I've run across is whether or not to drill drainage holes. Originally I was going to, however I'm slightly worried about what could run into the water portion, so I was hoping I could get away with very careful watering, what do you guys think?

---------- Post added at 10:25 PM ---------- Previous post was at 10:11 PM ----------

Sorry for the huge copy/paste from my other thread. There's also a couple youtube videos in there somewhere.


The cardboard in the pictures is in there just until some silicone dries


The destruction left behind:


I was initially gonna use the black foam for just the waterfall and against the glass on the sides, so it would be black when looked at from the side, however after seeing how little the pond foam expands I've decided to use it for just the waterfall.


Really should've been more patient with this part, got a lot of sag. For the time being it'll at least be a good base for the top layer:


http://www.youtube.com/watch?v=bP8CL...fLqK40QFeahWSE


http://www.youtube.com/watch?v=0grqT...pyuaqrYyYtKSc=


Here's some pictures of the tank after the first coat of sealer dried. Still haven't fully sealed the tank because there's more grouting and great stuff work to be done so there's no fts yet but here's some closeups of it


So far I'm really happy with the sealer, easy to apply, easy to clean and comes out looking great. In quite a few spots it gathered on individual coco fibre strands and looks like droplets of water

Here's a couple pics but it was tough to get a good shot of it. I'm also still failing at taking a good fts with the current lighting so I'll probably take a video later and post that.


Just took a video of the paludarium after the new light arrived. Sorry for the really dirty glass, I'm waiting on razor blades to clean up the leftover mortar mix. I also added some G.S. to the waterfall for a more realistic look. The blue led's are near the end of the video.

New light for Paludarium - YouTube
Reply With Quote
  #2  
Unread 05-30-2012, 03:01 AM
megamax42's Avatar
Chasing Crickets
 
Join Date: May 2012
Posts: 31
megamax42 is on a distinguished road
Default

As for the water substrate I was thinking Flourite original for the color.

Reply With Quote
  #3  
Unread 05-30-2012, 11:33 PM
Vive Newbie
 
Join Date: May 2012
Posts: 9
thething84 is on a distinguished road
Default

Looking good so far. Eagerly awaiting more pics. I am currently trying to design and decide how to make my FBT tank
Reply With Quote
  #4  
Unread 06-02-2012, 03:12 PM
megamax42's Avatar
Chasing Crickets
 
Join Date: May 2012
Posts: 31
megamax42 is on a distinguished road
Default

Thanks! How are you going about building yours? I had a hard time deciding false bottom or partition.

Here's a video of it I took today, having the light on it made me see all the spots that need touching up but other than that it's almost ready for plants.

So close I can taste it - YouTube
Reply With Quote
  #5  
Unread 06-03-2012, 03:38 AM
megamax42's Avatar
Chasing Crickets
 
Join Date: May 2012
Posts: 31
megamax42 is on a distinguished road
Default

Nighttime led's, although the camera I was using really hated the wavelength generated
I also went ahead and bought an Eheim 2213, as well as flourite original and dark so I can do some experimenting.


Reply With Quote
  #6  
Unread 06-04-2012, 01:19 PM
megamax42's Avatar
Chasing Crickets
 
Join Date: May 2012
Posts: 31
megamax42 is on a distinguished road
Default

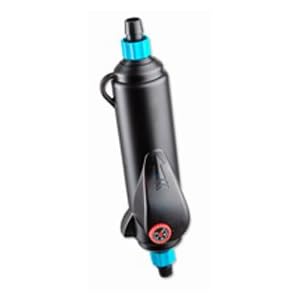
Just ordered a heater as well:

Reply With Quote
  #7  
Unread 06-08-2012, 10:26 PM
megamax42's Avatar
Chasing Crickets
 
Join Date: May 2012
Posts: 31
megamax42 is on a distinguished road
Default

Got the filter in today, hooked everything up but not entirely happy with a couple things. The little pool next to the waterfall that has water coming entering at a drop a second (literally) has a spot near the back where the water is dripping onto the platform, that same spot also needs some grout so I'll post pictures once everything is finished
Reply With Quote
  #8  
Unread 06-18-2012, 01:39 PM
megamax42's Avatar
Chasing Crickets
 
Join Date: May 2012
Posts: 31
megamax42 is on a distinguished road
Default

I ran into a couple problems when I filled it up, the little pool to the left of the water feature (which slowly feeds the pool) had a low spot in the back where it was hard to reach. When it started filling up the water would drain backwards onto the platform instead of into the water portion, an obstacle I had for some reason not thought of when I was designing it. Thought I fixed it, filled it back up and there's still water back there! However it stayed the same level, so I tried draining the water portion and sure enough it drained from the platform, so there's a hole somewhere on it. I have it partially drained right now trying to dry out the platform so I can smother it in black silicone, since there will be soil over it anyways. Yesterday I added some of the flourite as well, will post pictures when everything settles.

Here's some pics now though to stay true to the title

Bottom of the tank; when I first started and used black great stuff I ended up spraying normal great stuff on top of it while it was still wet because I ran out of the dyed G.S., that black streak along the bottom is the black G.S. expanding underneath the white. I was mindblown at first to come to the tank the next day and see black G.S. oozing out of normal G.S. about a foot from where I sprayed it lol.


Flourite original and dark, original seems a little too light, dark seems a little too dark, hopefully combined it should just about match the grout.


Heater and filter, really love the quick disconnects that came with the eheim, ball valves so I can adjust the flow to the water feature if need be.


Reply With Quote
  #9  
Unread 07-03-2012, 11:27 PM
Vive Newbie
 
Join Date: May 2012
Posts: 9
thething84 is on a distinguished road
Default

mines only a 24" tank. but i have gone for a partition rather than flase bottom. thats as far as i got atm. slow build mine.
Reply With Quote
  #10  
Unread 07-20-2012, 04:51 PM
megamax42's Avatar
Chasing Crickets
 
Join Date: May 2012
Posts: 31
megamax42 is on a distinguished road
Default

Girlfriend lost the camera charger so in the meantime here's a crappy cell phone pic. The plant decisions/placement are not finalized yet and I still need to find some very high light plants that will be suitable for the upper planters.

Planted some dwarf baby tears in the little pool next to the waterfall in the hopes that they switch to an emersed state and form a carpet poking out of the water.

The plant on the right is a peace lily, not sure if this will stay but in the meantime it takes up some space.

The vals in the front will not be staying, I just threw em in there for cycling purposes.

That ivy-esque plant (species unknown, however it resembles Ficus pumila var. minima) on the left doesn't have a permanent location yet. I like where it is on the ramp, however I don't want it stopping the toads from climbing back on to land. I would be ecstatic if it started creeping up the planter on the left (the coco fiber thrown into the grout should be great for it to grab a hold of), however I also want some to remain hanging in the water. The white clouds (the only occupant of this tank at the moment) really enjoy them in the water and can very often be seen swimming through the leaves, an awesome effect with the backdrop of bright green and the fish so close to the surface.

I got the moss from my lfs a couple days ago, a huge patch I managed to cover most of the lower platform with for only $3. However the moss between the left cave and shallow pool isn't doing so well. I'm assuming it's the light intensity because the moss on the far left and right is doing fantastic, and they're shaded by the planter ledges. Fortunately there's a bunch of low light, medium light, and high light zones, so I'm just gonna let them do their own thing. Hopefully the different zones will do some landscaping/aquascaping for me.

As for the construction, I'm generally quite pleased with it. The only negative aspect I'm seeing is the sealer turning cloudy after being submerged. Though hopefully over time bacteria and algae will have grown and died repeatedly on it until it's no longer noticeable. If you look at the water feature where it dumps into the aquarium portion you can see it's already turned from milky colored to a dark greenish-brown.

Reply With Quote
Reply


Currently Active Users Viewing This Thread: 1 (0 members and 1 guests)
 
Thread Tools
Display Modes

Posting Rules
You may not post new threads
You may not post replies
You may not post attachments
You may not edit your posts

BB code is On
Smilies are On
[IMG] code is On
HTML code is Off
Trackbacks are On
Pingbacks are On
Refbacks are On


All times are GMT -4. The time now is 08:54 PM.
Powered by vBulletin® Version 3.8.1
Copyright ©2000 - 2013, Jelsoft Enterprises Ltd.
Search Engine Optimization by vBSEO 3.6.0
(c) Vivarium Forum 2006-2007Ad Management plugin by RedTyger